Part 3 – Optic Mounting
Optic mounting is a pretty critical step in rifle set up, if not done correctly you end up with things in the wrong place, things coming lose or even worse, things end up broken. Simply put we have the two most important parts of our system, the rifle and the optic, so we need to be sure this is done right. With that said, the best way to start is by going down the checklist and making sure we have the right tools for the job.
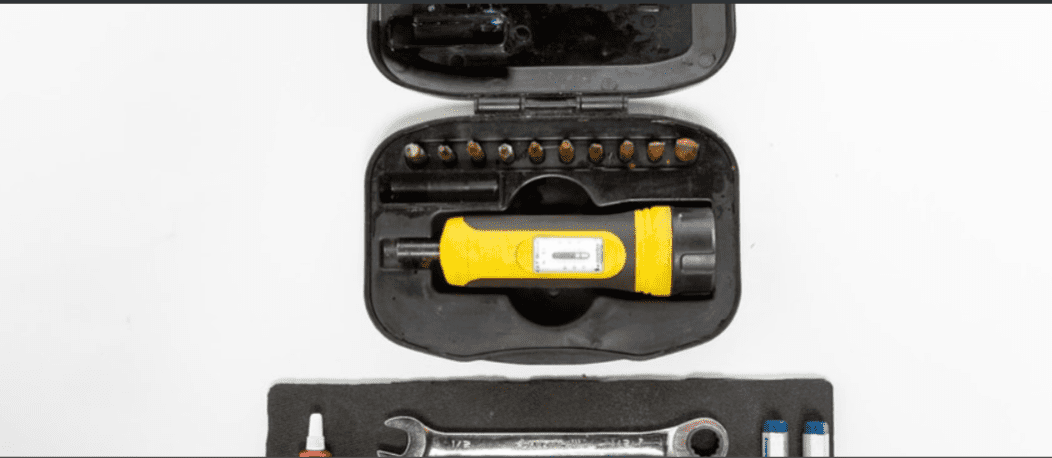
Optic Mounting Check List
- Loctite – (Looking for 242/243 or “the blue stuff “ is what you what)
- Torque Wrench – (Make sure that bad Larry is in Inch/lbs., Wheeler Fat Wrench is ideal)
- Level Kit – (Because locked and torqued is fine but if its cockeyed what’s the point?)
Now before we get into the technical aspect of mounting, let’s talk about the why. Some of you are probably saying to yourselves “Naw dawg, I’m good, no need to move anything!”. That may very well be the case but for some of you, I know you are just being lazy. The fact is, especially if you’ve just changed your length of pull and comb (as discussed in parts 1 and 2), some of you will need to make some adjustments. Furthermore don’t just assume that because you had some guy behind the gun counter at Bass Pro Shop or L.L. Bean or wherever, mount your optic, that you’ll be good…more often than not, it won’t be.
Clean Up
If you are starting with an optic already set up in a mount or rings, the first step is to take it all down. Reasoning here is we want to clean up the mounting hardware, particularly the ring cap screws, by removing any grit or old Loctite (if there even was any to begin with) before reapplying Loctite and re-torquing things. This is easily accomplished with a small glass bowl of Acetone*, simply drop your screws in so that they are fully submerged for about 20 minutes or so and that will help break that old stuff up. I if you have some additional crud that won’t break lose, a metal wire brush should nock the excess off before moving on.
*I shouldn’t have to say this but keep the acetone away from your
optics is not the best stuff for optical coatings and seals.
Mounting
Strait out of the box or at least freshly clean, we can now move along to the mounting. This can be a little tricky but the best rule of thumb here is don’t push the rings or mount all the way towards the front or back. On a bolt gun I like to set up the rings or mount with maybe 1-2 slots to spare from the front or rear of the receiver rail.
On gas guns this same methodology works well on large frame rifles like SR25/AR10s but on the small frame rifles it’s a pretty safe bet that due to the shorter receiver, you’ll want to push that front ring or the lead edge of that single piece mount all the way forward on the receiver. Additionally, if you’re mounting an optic on a small frame rifle, a cantilever mount is going to be your best friend in order to allow you to make the most amount of adjustment here.
Once you get your rings or mount in place, make sure you slide them forward toward the front of the rifle so that the lugs are snug against the back of the rail slots. Reason being is that sometimes there is a little bit of play between the two and it’s better to take that out now rather that have the rings or mount shift on its own later. At this point a simple hand snugness on the mounting cross bolts will keep the rings or mount in place while we bust out the tools.
Torque to Spec
Getting down to business you’ll need to bust out your Inch/lbs. torque wrench for the next bit. The focus here in this article is mostly geared toward traditional ½ inch mounting cross bolts, which are still the most common, so if you’re running something with smaller mounting cross bolts, you may need to adapt to what torque setting you are using. Generally speaking, most ½ mounting cross bolts like those from Leupold, Nightforce, Badger Ordnance, etc. are going to require a setting of 55 to 65 in/lbs.
Once the wrench is set, torquing cross bolts is a simple affair, just make sure you break the torque over at least twice on each cross bolt and reset the wrench back to “0” inch/lbs. so you don’t forget and try to torque your ring caps at 65 inch/lbs. because that will strip the treads.
Pro Tip
– Back in the day most snipers didn’t carry a full deployment kit of tools in their rucks. Instead in order to save weight we found if you simply hand tight the mounting cross bolts and take a ½ crescent wrench and go a quarter of a turn farther… Ba Da Boom! You come right in at 65 inch/lbs. of torque.
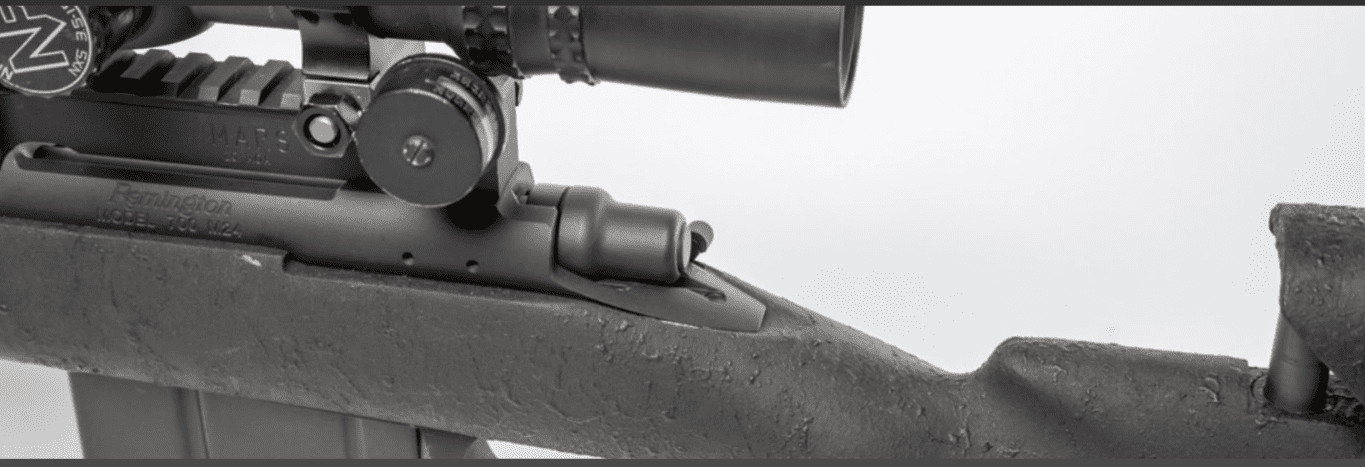
With the rings or base set in place, next it’s time to set the optic up for proper eye relief. Setting proper eye relief, first involves turning the optic to its maximum magnification, then setting the optic into the rings or base and getting down behind the rifle with a fundamentally sound shooting position. It is best to aim at some sort of high contrasting background like a white wall.
Pro Tip
– As exampled above, on most bolt action rifles if you bring the ocular housing in line with the rear tang of the action, you’ll likely be in the right ballpark +/- 0.5 inch. Same goes for gas guns, if you bring the ocular housing in line with the charging handle.
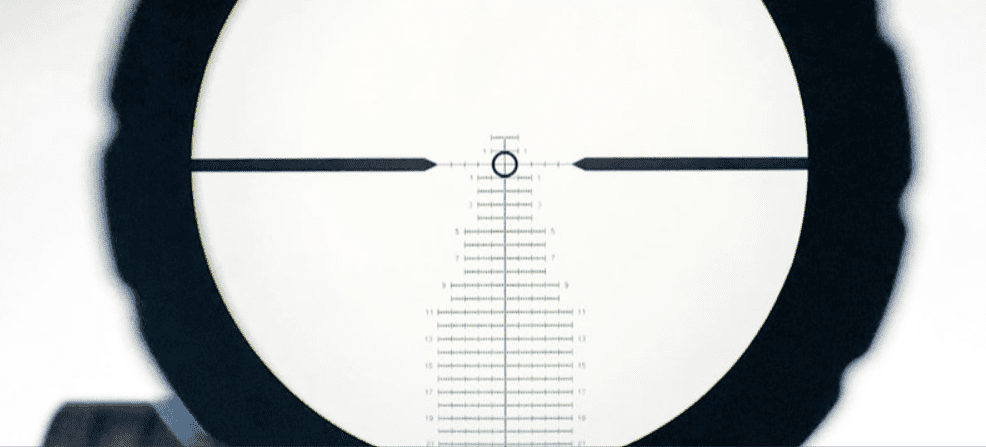
Once behind the rifle, as you slide the optic forward or back, you’ll see the shadow around the edge of the field of view grow or shrink. What we want is to have a nice clean edge all the way around the field of view. Again, you need to be at maximum magnification for optimizing this, so you’ll have the least amount of wiggle room in your optics eye box.
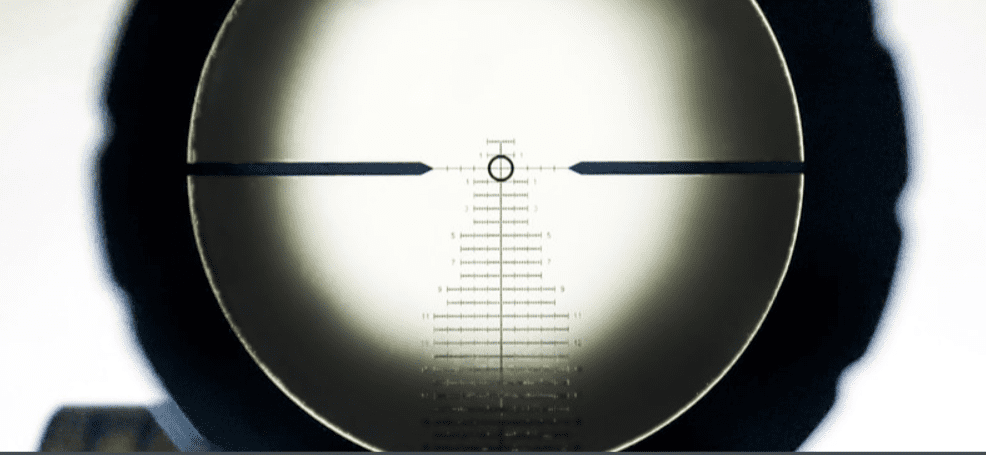
Pro Tip
– Incorrect eye relief as exampled above, is easily diagnosed by the shadowing around the edges. The correct eye relief is seen below, with a clean crisp image all the way through the field of view.
With the eye relief set, we can emplace the ring caps and start tightening down the screws. Here we want to make sure there is a nice even gap on each side of the caps and we only need to go hand tight for the moment. Having this balanced gap will help when it comes to leveling.
Leveling Up
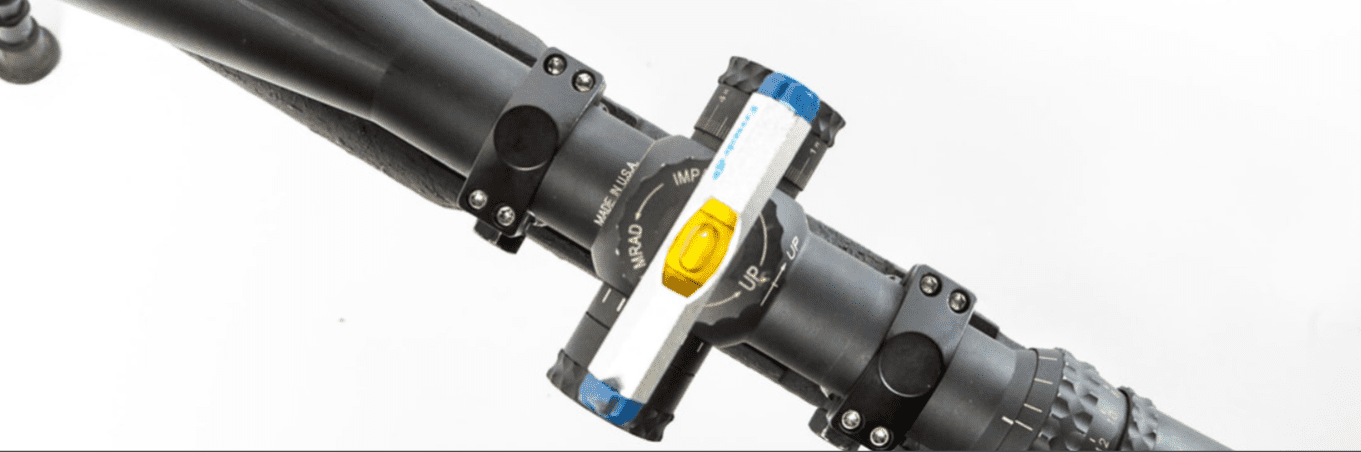
Now there has been lots of different talk over the years as to what is most important here and we could argue a bunch but for the sake of simplicity, we will keep this focused on achieving a mechanical level. Ultimately, we just need the optic/reticle to be level to the world, because as we make adjustments to the turrets or hold using the reticle, if the optic is not level then an elevation and windage error is induce in proportion to the drop. To accomplish this, we are simply going to level the rifle, then level the optic to the rifle, so that when you hold the rifle level, the optic is thus also level.
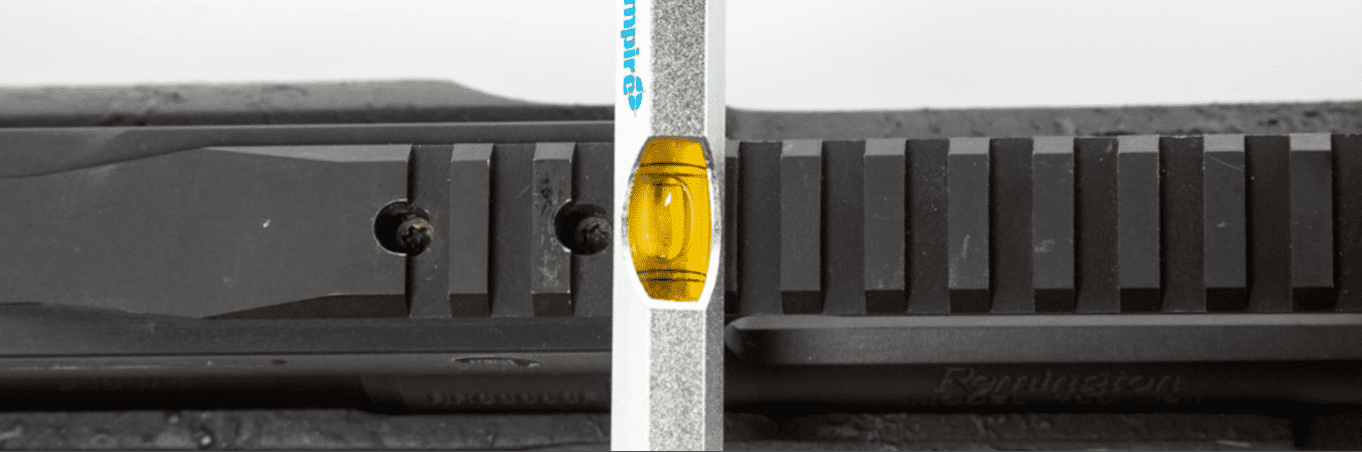
Here is where we bust out the leveling kit, in leu of such things like purpose-built levels, I’ve also used the level on my iPhone. As described above first things first, we level the rifle, usually off the action or the receiver rail. With the rifle level, go to the ring cap screws (which should be only hand tight) and loosen them just enough to allow the optic to rotate in the rings or mount. Now level the optic using the level as placed on the elevation turret.
With everything hand tight, take a quick moment and double check the level before we get wet and wild with the thread locker. From here we’re going to go back through each screw one at a time and applying a single drop of thread locker to the treads and return the screw back to hand tight.
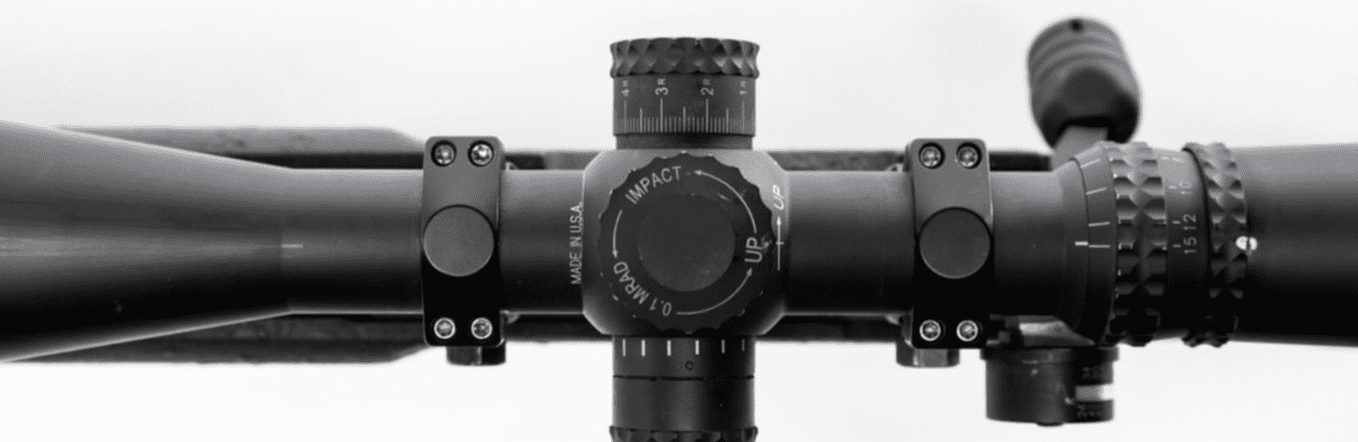
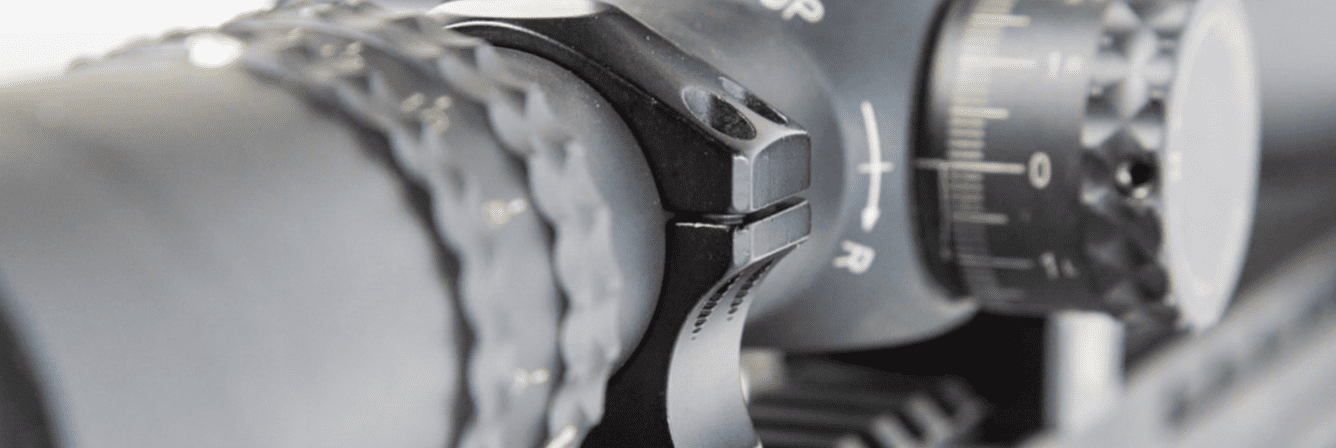
Once each screw has been tagged with thread locker and replaced, now is the time for the final torquing. Setting the wrench to 15in/lbs. we will proceed to torque, using the above image as reference. Starting at the front ring cap, tighten the front left screw to all the way to 15in/lbs. Then proceed to similarly tighten the back right screw. From there, move to the back ring cap and repeat the pattern, front left screw…then back right screw.
Now return to the front ring cap and tighten the front right screw, then move to the back left screw of the front cap. From there, move to the back ring cap and repeat the pattern, front right screw…then back left screw. Lastly repeat the whole pattern one final time and triple check the level. If everything is still good, then congratulations you now have a properly mounted optic!
Stay tune for Precision Rifle Setup Part 4 (yes there’s more) where we will be covering the commonly overlooked practice of setting ocular focus.
One Response
[…] that is in fact the case for you, grab your wrenches and Loctite and standby for “Precision Rifle Set Up – Part 3 – Optic Mounting“. Even if it looks good, the rest of you are probably going to want to tag along as well, […]